

Welcome, dear friends and bread enthusiasts, to a delightful new chapter in your homemade breadmaking journey! Today, I'm unveiling a recipe that's sure to win both hearts and tastebuds alike: the charming and oh-so-enticing Batard Bread. You may know it as a close cousin to my beloved Dutch Oven Sourdough, but with a delightful twist that's impossible to resist.

Imagine a loaf that embodies the perfect balance between crusty, golden exteriors and irresistibly chewy interiors. That's precisely what this homemade French batard delivers! With just four simple ingredients, a touch of baker's intuition, and a little flour on your hands, you'll be able to bake a batard loaf that is equal parts breathtakingly gorgeous and an absolute delight to savor with each and every bite.
Remember the flavors and textures you adore in my classic Dutch oven bread, but now picture a loaf that has taken on a more oblong shape. It's like a scrumptious, crusty baguette's laid-back cousin—an appealingly elongated beauty that exudes a rustic charm all its own. Add a bit of my homemade plum jam, apricot preserves or strawberry rhubarb jam on top - breakfast perfection.
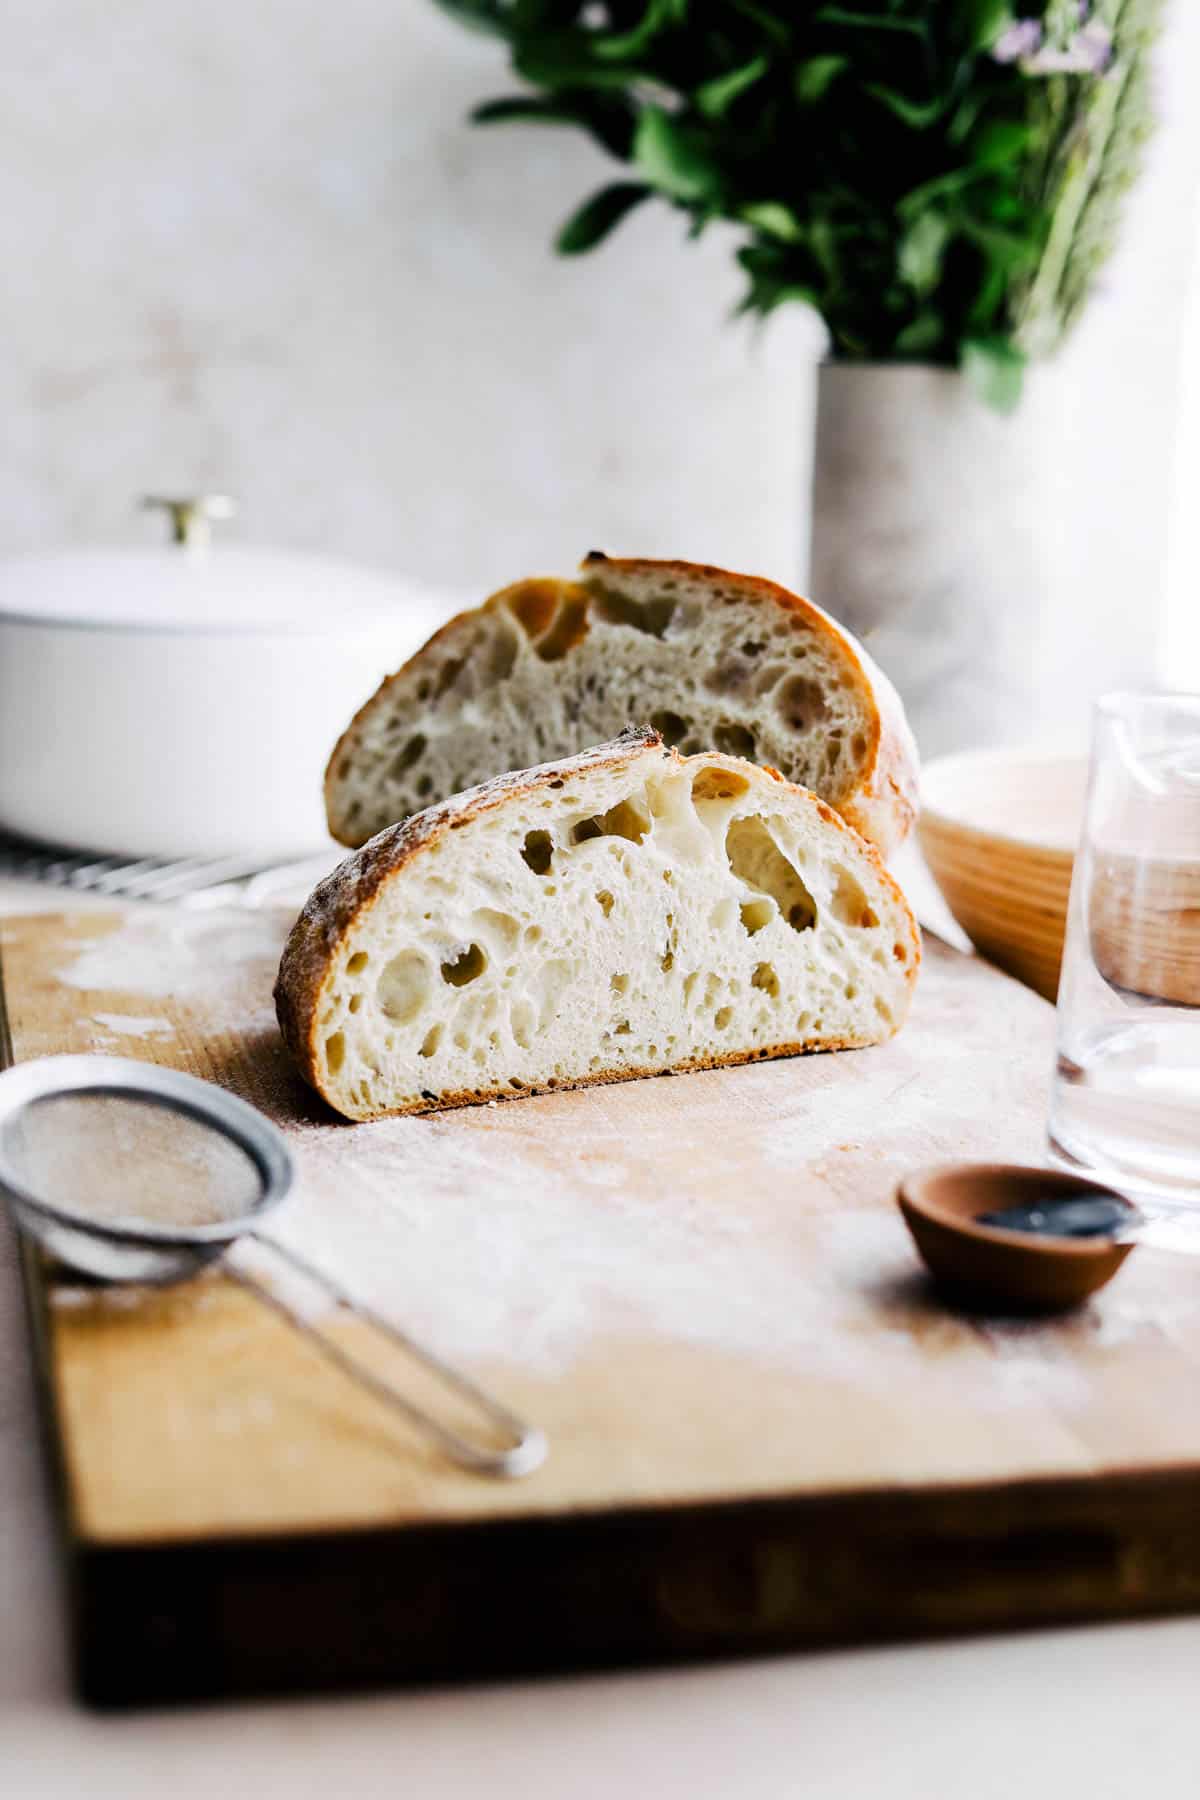
Crackling with character, the crust of this batard French bread boasts that delightful, audible crunch, heralding the magic that awaits within. As you slice through its golden shell, you'll reveal a treasure trove of pillowy softness and a beautifully developed crumb that dances with tangy flavor.
One of the most incredible aspects of this sourdough batard is its simplicity. With just flour, water, salt, and the magic of sourdough starter, you can create a mouthwatering masterpiece. It's amazing how only a few humble ingredients can come together to form a piece of edible magic. Seriously, friends. If you want to impress your loved ones, it's time to get on the homemade bread-making train.
⭐ Why You’ll Love This Recipe
Aside from being incredibly satisfying to master and delicious beyond your wildest dreams, this French bread batard recipe is also:
- Made With Only 4 Simple Ingredients - Well, technically speaking, it’s really just 3 — bread flour, water, and salt. But, you’ll use the bread flour and water to create your sourdough starter, so we’ll call it 4. Then you've have an artisan bread with an oval shape in no time!
- Fun Twist On Round Sourdough - Once you’ve tackled the bread-making basics, it’s fun to branch out and try new shapes and forms using the same base recipe!
- Wholesome & Delicious - One of the remarkable benefits of homemade sourdough batards is their easy digestibility. Thanks to the fermentation process, sourdough bread becomes a friendlier option for our digestive systems. The natural enzymes and beneficial bacteria present in sourdough help break down complex carbohydrates and gluten, making it easier for our bodies to absorb and enjoy without discomfort.
- Versatile - Whether you're craving a simple slice topped with your favorite spread, using them for sandwiches or paninis, or even transforming them into delectable garlic bread or croutons, these batards can do it all. Their sturdy crust and tender crumb provide the ideal canvas for exploring a wide range of flavors and culinary creations, allowing you to unleash your creativity in the kitchen with every bite.
Note: Remember, this batard bread recipe is a delightful new shape variation of my basic sourdough bread. So, if you've mastered the latter, you're already on your way to becoming a bread batard maestro!
🍴Ingredients

As promised, you only need a handful of ingredinets to make homemade batard delicious recipe:
- Sourdough Starter - Feel free to flex your culinary muscles and make your own active sourdough starter using just flour and water. Alternatively, you can easily find pre-made starters online, in specialty stores, or perhaps borrow some from your friendly neighborhood bread-making buddy. Once you've got your fermentation process and starter bubbling away, the possibilities are endless! Gift it to loved ones or transform it into an array of delectable treats like banana bread, flatbread, focaccia, pancakes, and crackers—the choice is yours!
To embark on this delightful Batard Bread adventure, head on over to my Ultimate Primer on Making Sourdough Starter and guide for freezing sourdough starter. I'll guide you through the process, step by step, ensuring that your jar of bubbling starter is ready to create delicious bread magic in your kitchen!
- Water - If possible, opt for filtered water to elevate the taste of your sourdough creation. Trust me, it makes a remarkable difference! Also, keep an eye on your water temperature. Try an get it to room temp, preferably around 70F.
- Bread Flour - While all-purpose flour can do the trick, I highly recommend using the protein-rich goodness of bread flour. Its higher protein content means more gluten, resulting in a superior structure for your homemade bread.
- Salt - In my kitchen adventures, regular kosher salt takes the spotlight. However, sea salt can also play a delightful role. Just be sure to steer clear of iodized table salt, as it can leave a bitter aftertaste.
- Olive Oil - No need to bring out your prized bottle of cold-pressed finishing oil just yet. The olive oil in this recipe is simply for greasing the bowl, saving the splendor for when the bread is fresh out of the oven and ready for dipping.
- Rice Flour - Ah, the secret to success when dusting your banneton! Opt for gluten-free rice flour, which is excellent at preventing any sticking. However, if rice flour isn't at your fingertips, fear not! A generous coating of all-purpose or bread flour can create a sufficient barrier.
⚒️ Equipment
Dutch oven sourdough bread doesn’t require a ton of kitchen equipment, either. Here’s what I suggest you use:
- Heavy Cast Iron Dutch Oven - Baking sourdough in a hot dutch oven provides the perfect humid environment for the loaf to become golden and crusty. If you don’t have one, you can swap in a heavy pot with a tight-fitting lid. That said, do yourself a favor and invest in a pretty one — you don’t have to spend hundreds of dollars to get a quality dutch oven these days!
- Banneton Basket- Also known as a bread-proofing basket or a brotform, bannetons come in basically every size and shape imaginable and they help to impart a pretty design on your bread dough crust.
- Razor - While you can totally get a specific bread scoring knife known as a lamé, you don’t need one if you’re just giving breadmaking a try. Just grab a fresh, clean razorblade instead to slash the dough.
- Parchment - I’ve said it before and I’ll say it again: parchment is a non-negotiable in the baking world! In this instance, it’ll allow you to carefully lower your sourdough bread into a preheated dutch oven without burning yourself or dropping the loaf.

📖 Step by Step Instructions
If you're a visual learner like me, you're in luck! I've prepared a video in the recipe card that takes you through each step of crafting your very own sourdough batard. Make sure to check it out before diving into the following directions. Now, let's begin!
Mixing and Folding the Sourdough Dough
Step 1: Levain Magic. Start by combining your active starter and water in a mixing bowl. Add bread flour and mix until the mixture becomes a homogenous blend. Transfer this levain to a covered container and let it sit at room temperature for approximately 12 hours.
Step 2: Autolyse. In a large bowl, mix your levain and warm water until fully combined. Add the bread flour and stir vigorously with a spatula, wooden spoon, or even your hands until the dough is smooth and clump-free. There's no need to have a stand mixer here! Cover the bowl with a tea towel, plastic wrap, or a damp kitchen towel and let it rest for 45 minutes.
Step 3: The Salt Connection. Sprinkle 2 teaspoons of kosher salt over your dough mixture and gently mix it in with a spatula or your hands until the salt dissolves completely. Grease a bowl with one tablespoon of olive oil, place the dough in it, cover it, and let it rest for another 45 minutes.


Step 4: Fold Your Way to Glory. Every 30 minutes, gently stretch the dough upward before folding it onto itself. Repeat this process four times over a span of 2 hours, rotating the dough as you go. After the fourth fold, allow the dough to rest undisturbed for 45 minutes.
Step 5: Pre-Shape. Here’s the best way to shape a batard that I’ve found: On a wooden cutting board greased with a touch of olive oil, gently shape the dough into a batard or oblong shape, being careful not to deflate it. Starting from the top edge, fold the dough down about one-third of the way towards the center. Next, fold the bottom edge up towards the center, slightly overlapping the previous fold, and pinch the dough in the middle to secure the seam. This pre-shaping process establishes the foundation for the charming oblong shape. Flip the dough seam side down, gently tuck the two ends underneath, and create some tension by dragging the dough against your work surface around ten times. You can find a detailed demonstration of this process in the accompanying video in the recipe card. Allow the dough to rest in a warm place, covered by a towel, for 30 minutes.
Step 6: Final Shape Beauty. Once again, follow the instructions from the previous step, and then place the oval loaf seam side up into a banneton that has been lightly dusted with rice flour.


Scoring and Baking your Batard Bread
Step 7: Preheat. The next day or the following morning, preheat your oven to 450 degrees, with your Dutch oven inside, for 45 minutes.
Step 8: Score with Style. Using parchment paper larger than the diameter of the dough, flip the chilled dough onto the paper. With a lamé, razor-sharp knife, or kitchen shears, score the top of the dough from top to bottom.
Step 9: Bake the Magic. Once the 45-minute timer goes off, carefully place the loaf into the preheated Dutch oven. Bake for approximately 25 minutes or until you spot a hint of browning on the edges and top of your loaf. At this point, you can remove the lid from the Dutch oven entirely. Continue baking for an additional 20 minutes or until the bread develops a rich, dark golden brown color and a crispy crust.
PRO TIP: Handle the hot sourdough with care, ensuring you don't burn yourself or accidentally drop it. The parchment paper will be your trusty companion here—use it as a grip to gently lower the loaf into the Dutch oven and place the lid on top.
Step 10: Unveil and Cool. Remove the Dutch oven from the oven and carefully lift the sourdough loaf from within. A small spatula can be handy for coaxing one side of the bread from the bottom of the Dutch oven. Place the hot loaf on a cooling rack and let it cool for a minimum of 1 hour.
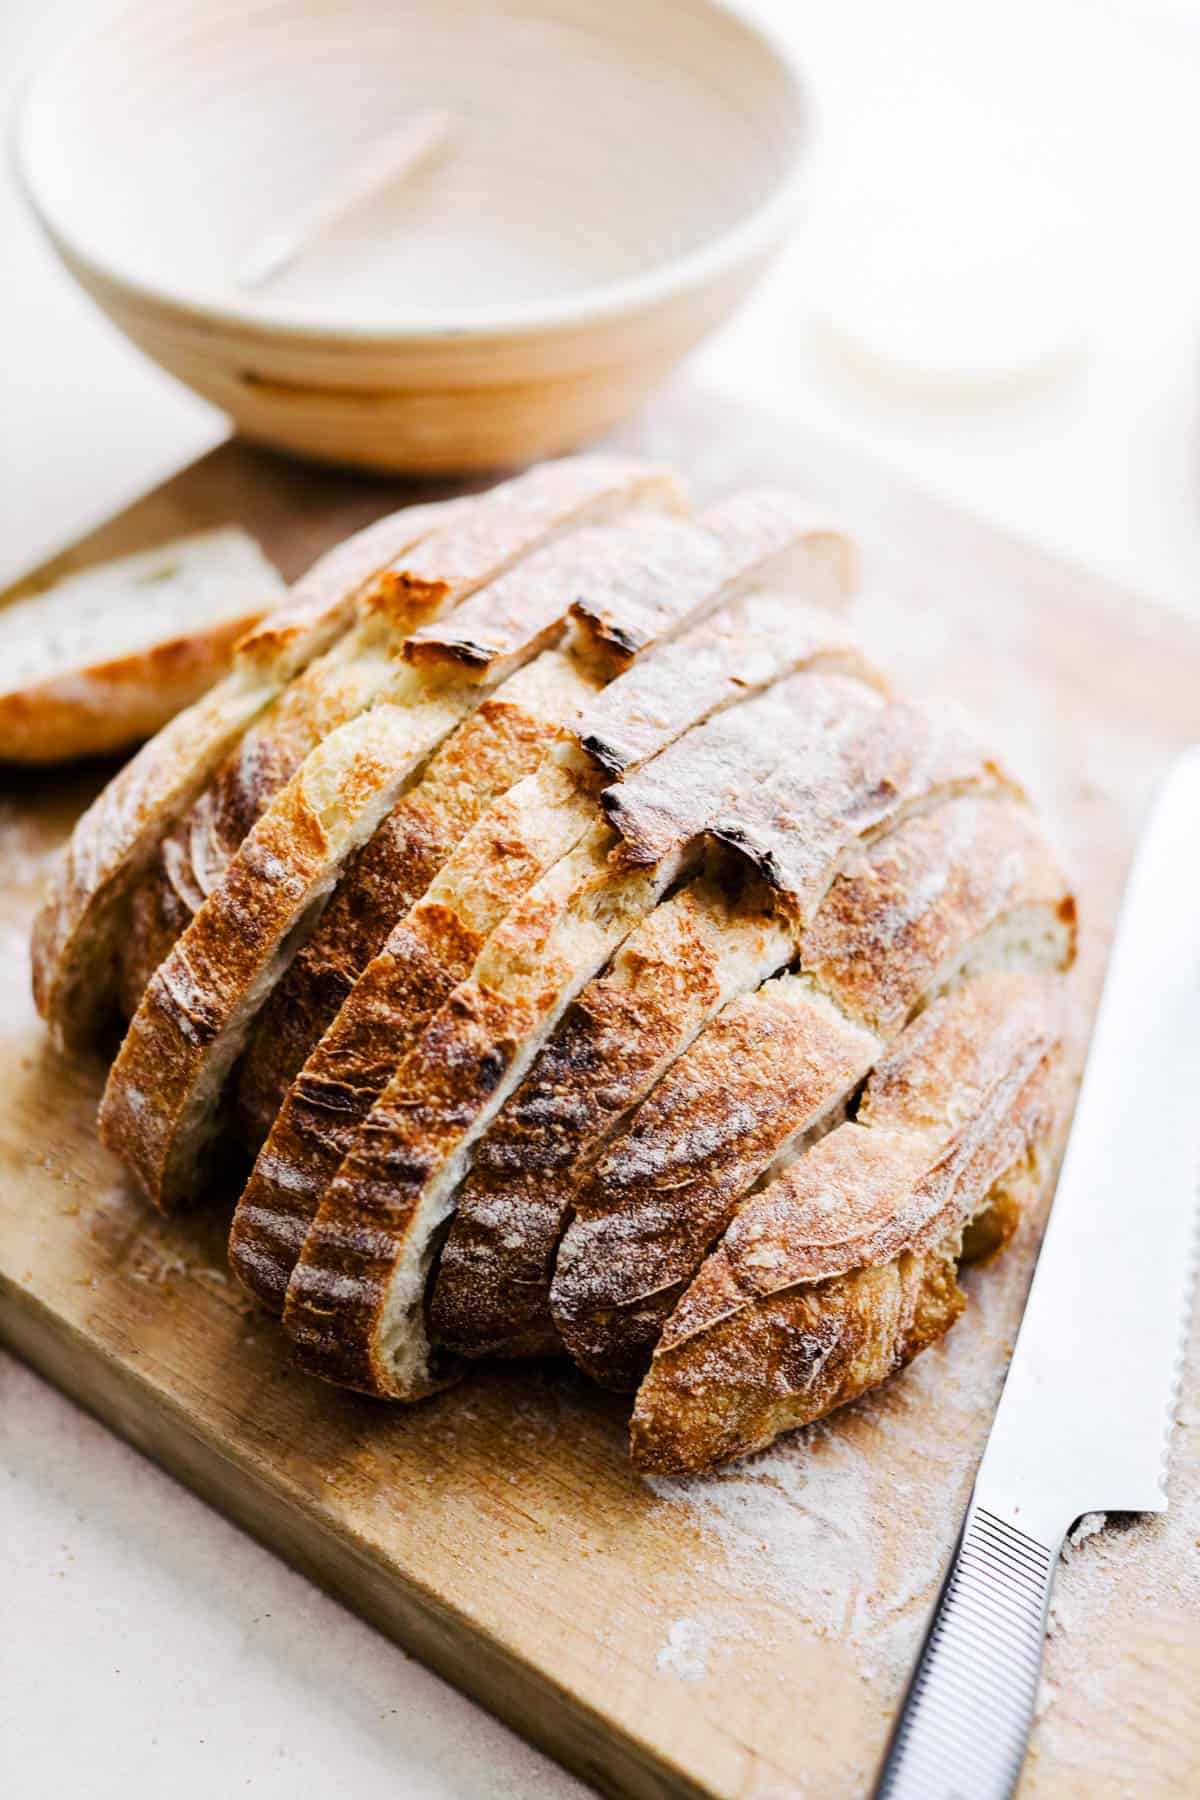
Step 11: Enjoy! Take a moment to revel in the joy of your freshly baked Batard Bread. It's time to slice, savor, and share the fruits of your bread-making labor!


👩🏻🍳 Expert Tips
Here are some of my best tips for crafting an irresistible loaf of batard bread:
- Embrace the Beauty of Imperfection: Remember, homemade bread is all about embracing imperfections and celebrating the uniqueness of each loaf. Don't worry if your French batard bread doesn't turn out picture-perfect like the ones in glossy magazines. It's the character and soul (and stellar taste!) of your homemade creation that truly matters!
- If you want your batard to look more pro, you may want to consider investing in an oblong Dutch oven so you can keep the shape better. I, for one, don’t have space in my LA kitchen for another big ol’ pot, so I’ve embraced my own slightly squatter batard shape. 🙂
- Practice Patience: Patience is key when it comes to achieving that perfect crust and crumb. Allow your dough to rest and rise at each stage of the process. Give it time to develop its flavors and textures, and resist the temptation to rush. Trust me, the end result will be well worth the wait.
- Get Creative with Batard Scoring: Scoring is not only practical but also an opportunity to showcase your artistic flair. Grab your lame, razor-sharp knife, or kitchen shears and create your own unique pattern on the surface of the dough. Here are a few ideas to get you started.
- Experiment with Flavors: While my classic batard French bread recipe is already a delight, don't be afraid to explore flavor variations. Add herbs, spices, cheese, or even olives to infuse your bread with exciting new tastes.
- Share the Love (and Loaf): The joy of baking is best when shared. Surprise your loved ones, friends, and neighbors with a freshly baked batard straight from your oven. The gift of homemade bread (paired with some homemade preserves, perhaps?) is always a winner.
- Water Your Hands: When making sourdough, it’s helpful to have a little bowl of water nearby. Dipping your hands in water prior to working with the wet, sticky dough will help immensely!
💭 Recipe FAQs
If you freeze it, it can last for up to a month! Follow the tips in my post about “How To Store Sourdough Bread” to get the most out of your batard loaf.
In the world of bread, batard refers to a charmingly oblong or oval-shaped loaf. Picture a smaller sibling of the classic baguette, with a playful taper at its ends. The name "batard" may sound a bit mischievous, but in breadmaking, it simply represents a lovable variation—a unique shape that adds a touch of whimsy to your homemade creations. So, embrace the fun and enjoy crafting your very own batard bread!
While both share a similar lineage, the key distinction lies in their shape. A batard is a lovable, oblong loaf, while a baguette is long and slender, with a classic cylindrical form. So, if you're seeking a slightly different bread experience, go for the batard's playful curves, or opt for the traditional elegance of a baguette. The choice is yours to embrace the variety of bread shapes!
I suggest reaching for a round dutch oven that is no smaller than 4 quarts and no larger than 7 quarts. I personally like using my 5 ½ quart dutch oven for making this sourdough loaf, and recommend using an oblong dutch oven if you want a long, classic batard shape!
📏 Tips for accurate measuring
When it comes to the science of bread baking, it is imperative that us bakers are measuring your ingredients as precisely and accurately as possible. This is why I highly recommend that you invest in a kitchen scale! Dry ingredients in particular can vary widely in terms of weight vs. volume depending on how you measure them. I know it can be a challenge if you are a beginner, but using a scale will also save you time; cut back on cleanup; and will allow for more consistent baking success - a total win!
More Sourdough Recipes To Try


If you try this recipe for Homemade Batard Bread, please leave a 🌟 review and share your creation with me on social media! You can find me on Instagram, Facebook, Youtube and Pinterest - for more delicious recipes sent straight to your inbox, sign up for my newsletter! 📧

Batard Bread ( Sourdough Dutch Oven Method)
Equipment
Ingredients
Levain
- 20 g (1 Heaping Tablespoon) Sourdough Starter, 100% hydration, float test before using
- 80 g (⅓ cup) Water
- 80 g (⅔ cup) Bread Flour
Batard Bread
- 100 g (½ cup) Levain
- 360 g (1 ½ cups) Water, 70 degrees F ideally
- 500 g (4 cups) Bread Flour
- 2 Teaspoons Salt
- Olive oil - for greasing bowl
- 3 Tablespoons Rice flour - for dusting banneton
Instructions
Levain
- Make sure to do a float test - It’s the best way to tell if your starter is fresh. Simply pinch off about 1 tablespoon of your starter and place it in a glass of water. If it floats, you're in business!
- Mix starter (20g) and water (80g) together before adding bread flour (80g) and mix until homogenous approximately 12 hours before you start the process of making your Sourdough loaf. Place in a covered container at room temperature.20 g Sourdough Starter, 80 g Water, 80 g Bread Flour
Batard Bread
- Mix your levain and water together until combined. Then mix in the bread flour until little to no clumps remain with a spatula or your hands and cover for 45 minutes. This is called the autolyse - hydrating your flour prior to moving on to the next step.100 g Levain, 360 g Water, 500 g Bread Flour
- *When making sourdough it’s helpful to have a little bowl of water nearby - dipping your hands in water prior to working with the wet, sticky dough will help immensely!
- Add 2 teaspoons of kosher salt to your dough and mix with a spatula or your hands until the salt granules have dissolved completely into the dough. Place in a bowl greased with one tablespoon of olive oil, cover, and set aside to rest for another 45 minutes.2 Teaspoons Salt, Olive oil - for greasing bowl
- Time to start folding the dough - every 30 minutes for the next two hours fold your dough as shown in the video below. Gently stretch the dough in an upwards motion before placing back onto itself - do this four times every 30 minutes rotating around the dough as you do so.
- Once you’ve folded the dough 4 separate times, allow it to rest for 45 minutes before continuing.
- Pre-Shape: On a wooden cutting board greased with a touch of olive oil, gently shape the dough into a batard or oblong shape, being careful not to deflate it. Starting from the top edge, fold the dough down about one-third of the way towards the center. Next, fold the bottom edge up towards the center, slightly overlapping the previous fold, and pinch the dough in the middle to secure the seam. This pre-shaping process establishes the foundation for the charming oblong shape. Flip the dough seam side down, gently tuck the two ends underneath, and create some tension by dragging the dough against your work surface around ten times. You can find a detailed demonstration of this process in the accompanying video. Allow the dough to rest, covered by a towel, for 30 minutes.
- Final Shape - Once again, follow the instructions above before placing the dough seam side up into a banneton dusted with rice flour. Place the shaped sourdough in the fridge overnight, wrapped in plastic wrap or covered with a lid or damp towel, to allow for a slow, cold final proof.3 Tablespoons Rice flour - for dusting banneton
- The next morning, preheat the oven to 450 degrees with your dutch oven placed inside while preheating - turn on your timer for 45 minutes. After turning on your oven, remove your sourdough from the fridge. Grab a piece of parchment paper larger than the diameter of the dough and flip the cold dough onto the parchment paper. Using a lame or a razor blade, score the bread one ⅓ of the loaf from top to bottom. See the video below for an example! Once your 45 minute timer has gone off, place the loaf into your preheated dutch oven. Be careful not to burn yourself or drop in your sourdough! The parchment paper is your friend here - use the parchment paper as grips to gently lower the loaf into the dutch oven and place the lid on top.
- Bake for about 25 minutes or until you start to see a hint of browning on the edges and top of your loaf. Once you see the top start to brown, you can remove the lid completely. Bake for an additional 20 minutes or until the bread is a rich, dark golden brown.
- Remove the dutch oven from the oven and carefully remove the sourdough from within - I usually use a small spatula to coax one side of the bread from the bottom of the dutch oven, allowing me to remove the hot sourdough loaf and place it on a cooling rack.
- It will be very challenging to wait before cutting into the loaf, but I promise you it’s worth it! Cutting into your bread when it is too hot could ruin it’s structure - I usually wait an hour at the very least before diving in unless you don’t mind cutting in early.
Video
Notes
- Where can I get sourdough starter? You can easily make your own using flour and water, or you can buy it online or from specialty stores. If you have any friends who like to make bread, I’d also bet they have some they’d happily gift you!
- How long does homemade sourdough bread last? If you keep it in an airtight container on the counter, it should last for 3-4 days. However, if you want it to last longer, I suggest slicing it, placing it in a plastic bag, and freezing for up to a month. Whenever a bread craving strikes, just grab a slice!
- What is the best flour for sourdough bread? I prefer bread flour, which has a higher protein content than regular all-purpose flour. More protein means more gluten, which in turn means a better structure for the bread to be crusty on the outside and irregularly crumbed on the inside. YUM!
- What is the best size dutch oven for baking bread? I suggest reaching for one that is no smaller than 4 quarts and no larger than 7 quarts.


Comments
No Comments