
Crusty, tangy, and perfectly stretchy, there’s nothing quite like a piece of freshly made sourdough. In this informative post, I’ll walk you through how to make Dutch Oven Sourdough Bread from scratch using nothing more than 4 ingredients – sourdough starter, bread flour, salt, & water. Baking bread in a hot oven and cast iron dutch oven yields a perfect loaf every time, even if you’re new to the world of homemade breadmaking, making this my go-to method. Now, on to the kitchen!
⭐ Why You’ll Love This Recipe
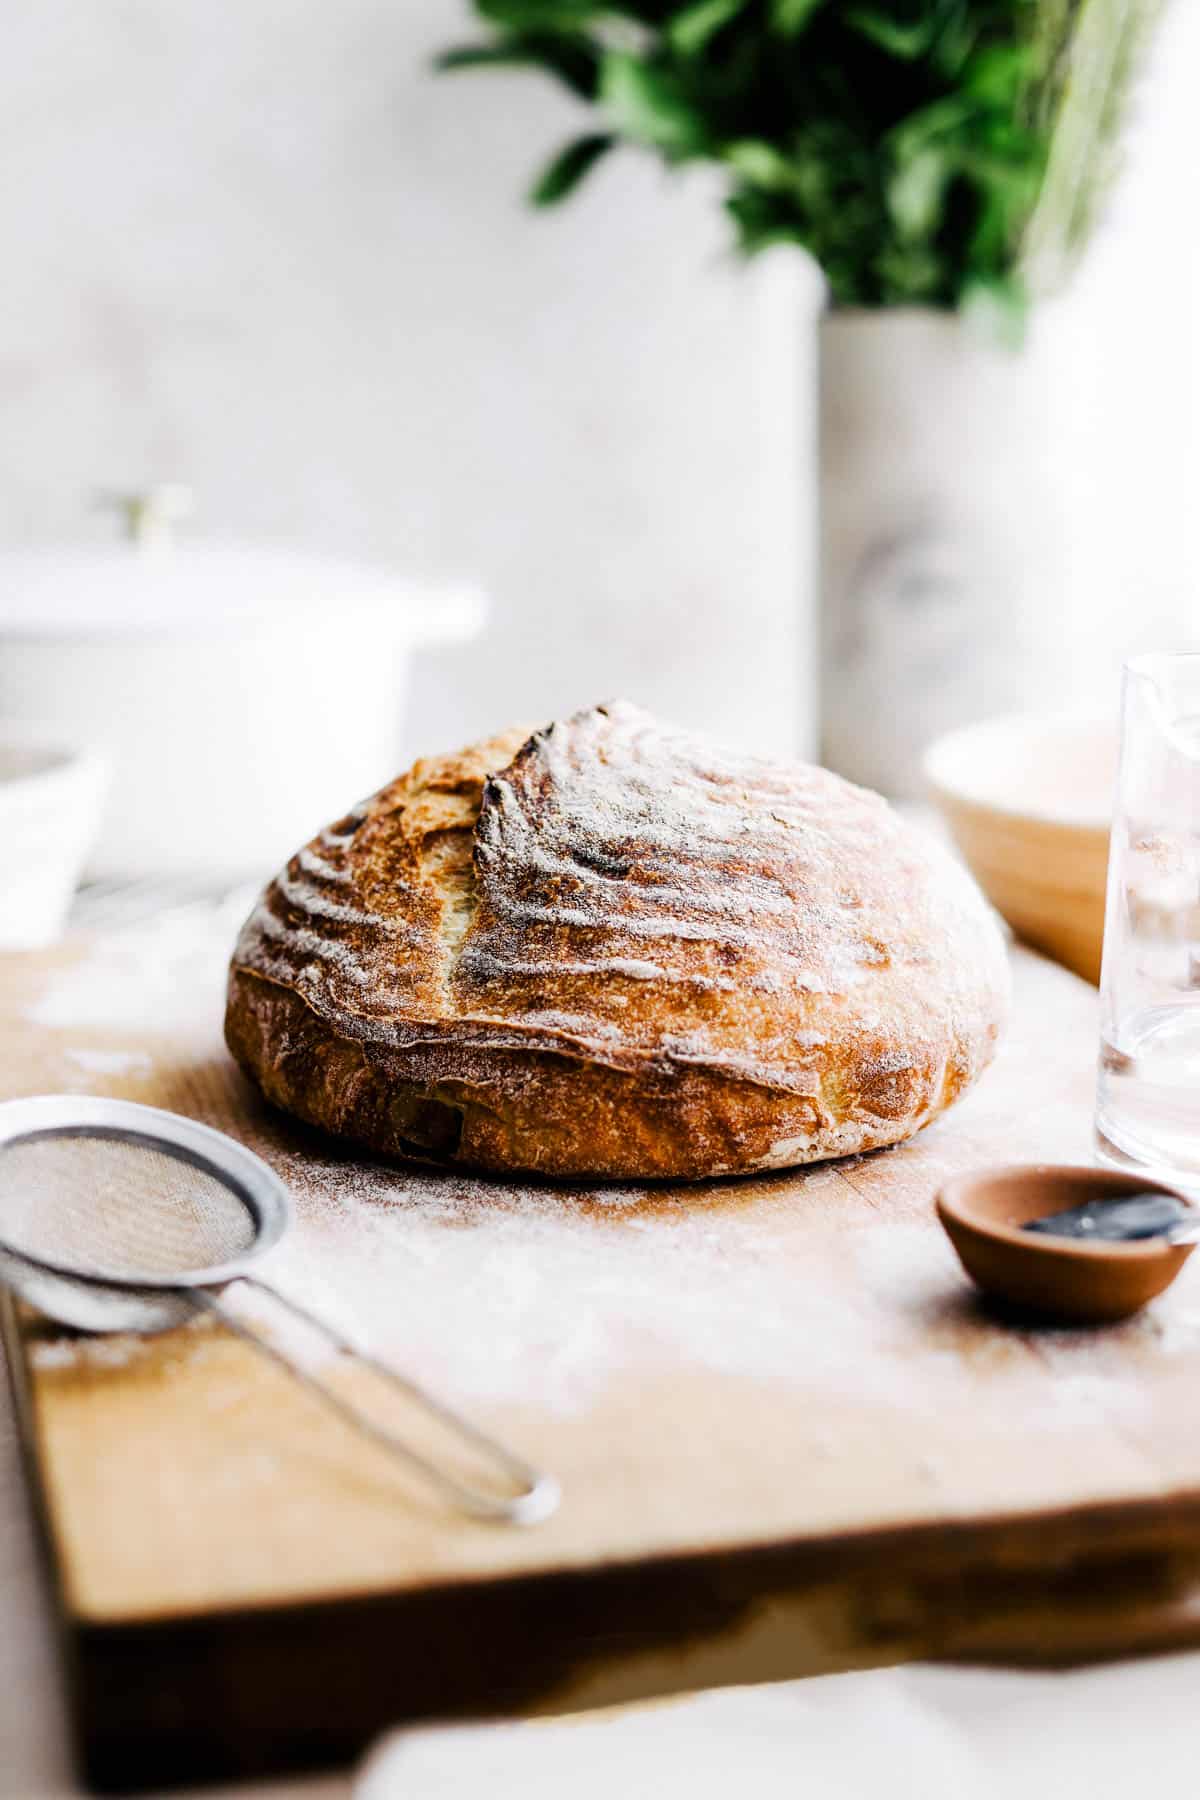
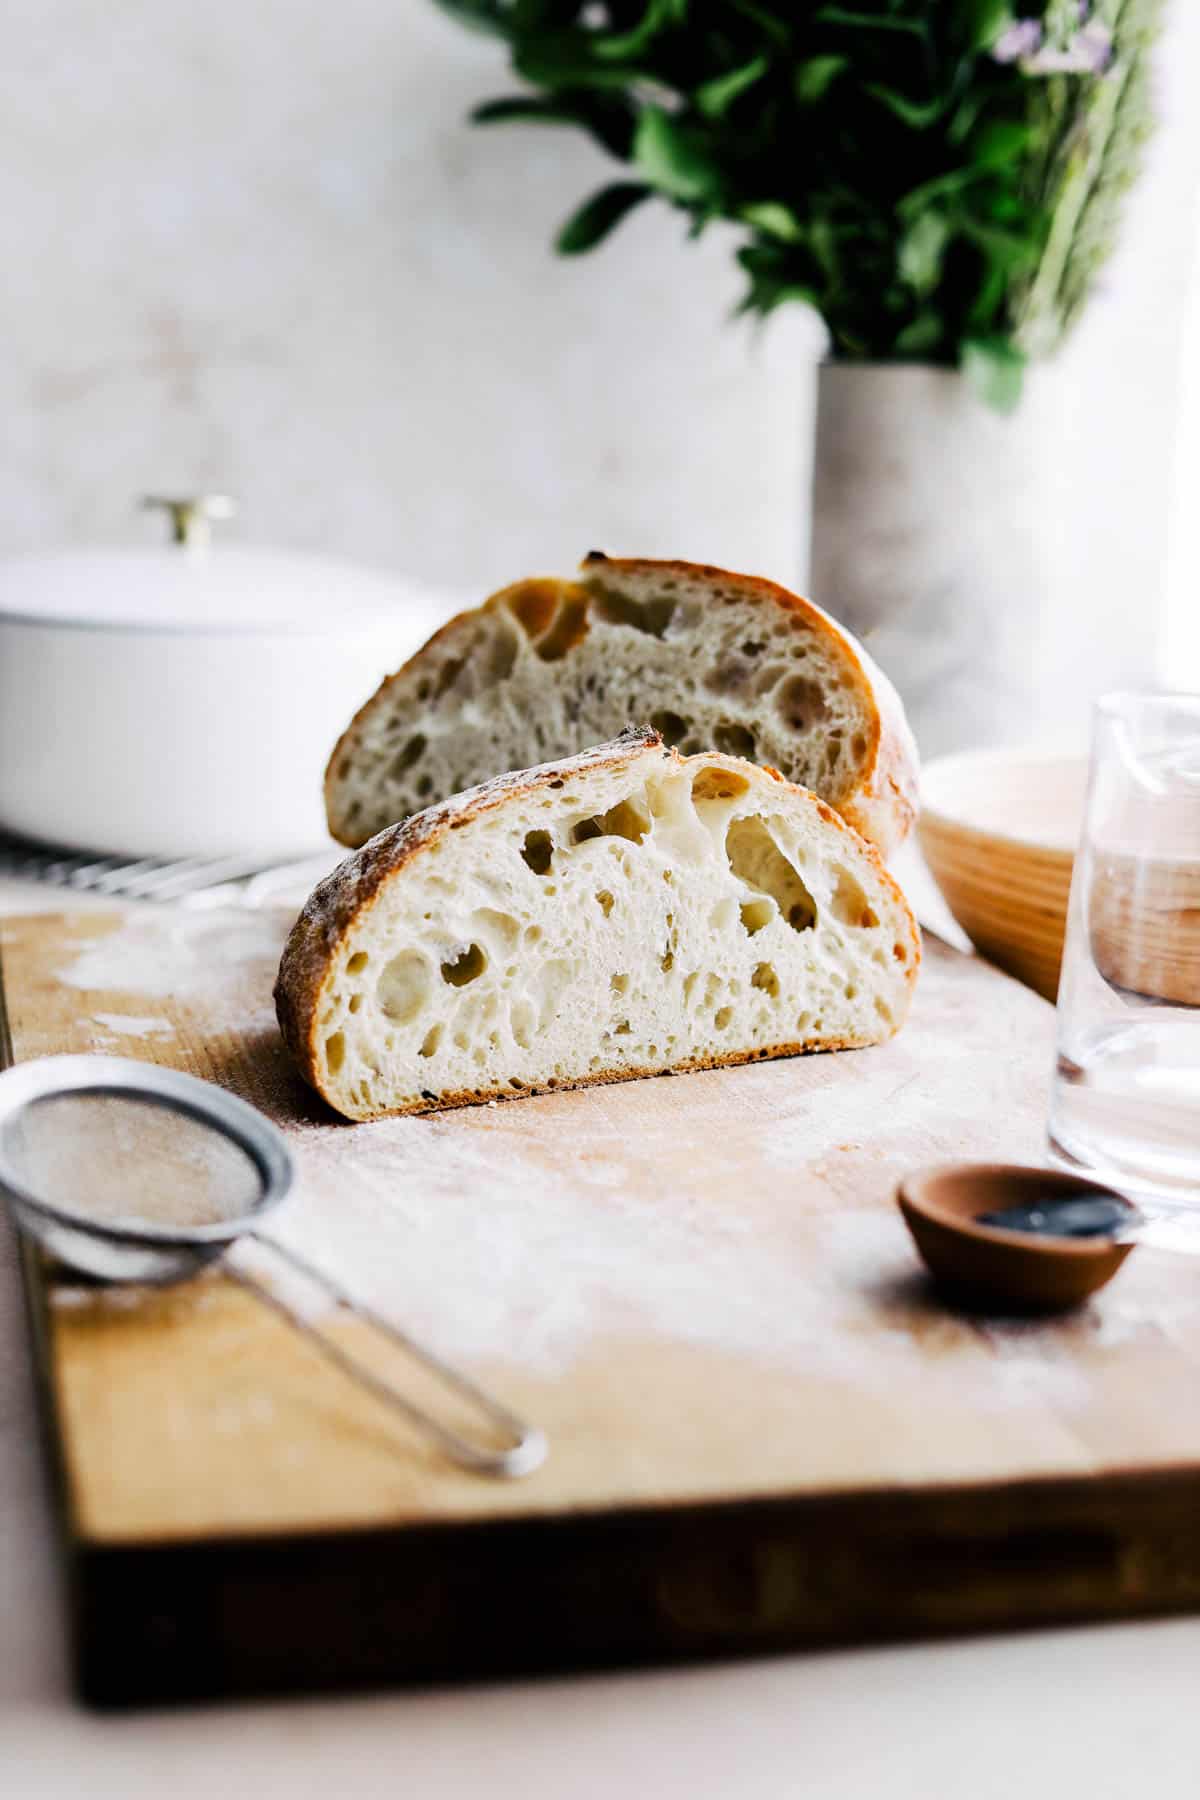
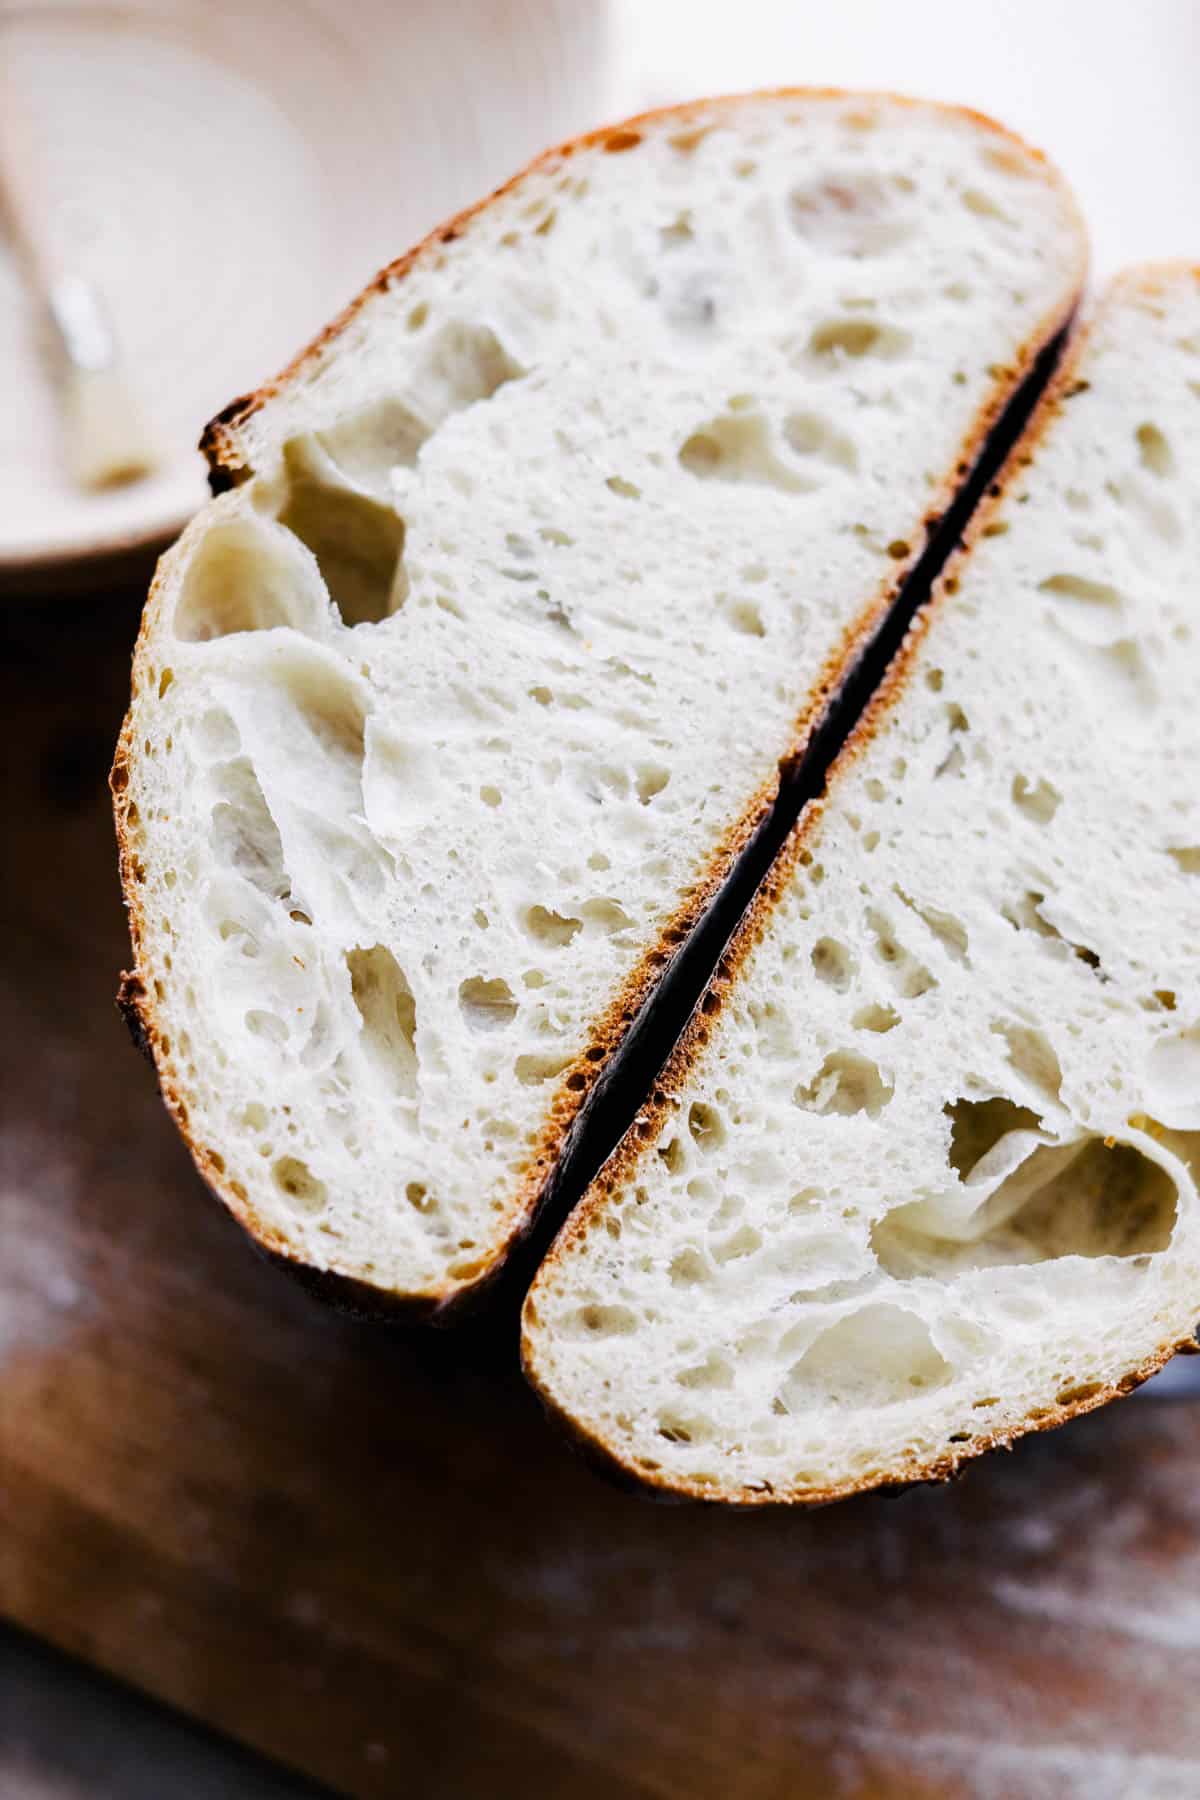
Each time I pull a fresh sourdough loaf out of the oven, I am still humbled and amazed at what Mother Nature can do with just 4 ingredients and a little human input. This recipe for from-scratch sourdough bread yields the most gorgeous, golden, crusty loaf with a soft, stretchy, and perfectly irregular crumb you could ever want, all using just 4 simple ingredients (one of which is water!).
While this rustic sourdough bread is indeed a lengthy recipe (you’ll need about 24 hours from start to finish), most of the time is spent waiting. None of the steps are particularly difficult, aside from having the patience and willpower to avoid cutting into your delightfully sweet-sour-yeasty smelling ball of goodness before it has cooled entirely.
And despite what you may think, you don’t need much in terms of special equipment or serious kitchen know-how to make your own homemade bread. I like to bake my sourdough in a dutch oven, which is one of my favorite kitchen staples. Once your bread is baked, whip up a batch of homemade soup to accompany it. What a delicious way to spend a chilly day!
🍴Ingredients

It’s kind of shocking how few ingredients there are in sourdough bread. Here’s what you’ll need to gather:
- Active Sourdough Starter - Feel free to make your own using just flour and water, or purchase (or borrow!) some pre-made starter online, in specialty stores, or from your bread-making buddy in town. Trust me, once you have your fermentation process and starter started, there will be a LOT that you can gift or turn into other sourdough bread recipes like flatbread, cinnamon rolls, cookies, pancakes, and crackers, to name a few!
Head on over to my Ultimate Primer On Making Sourdough Starter to make your own jar!
- Water - If possible, use filtered water. Your sourdough will end up tasting better for it!
- Bread Flour - While you technically can swap in all-purpose flour here, I prefer using higher-protein bread flour for most of my homemade bread recipes. More protein = more gluten, which means you’ll get a better structure.
- Salt - I use regular kosher salt for basically everything in the kitchen, but sea salt will also do. If possible, avoid using iodized table salt as it leaves behind a bitter flavor.
- Olive Oil - This is just for greasing the bowl, so don’t bust out your bottle of expensive cold-pressed finishing oil until after the bread is baked and ready for dipping.
- Rice Flour - You’ll want rice flour for dusting your banneton because it is gluten-free, unlike your sourdough. Other flours like AP or bread flour will absorb moisture from the dough, which can cause it to stick to the proofing basket. Rice flour will not. If you don’t have rice flour on hand, be super heavy-handed with your AP or bread flour to create enough of a barrier.
⚒️ Equipment
Dutch oven sourdough bread doesn’t require a ton of kitchen equipment, either. Here’s what I suggest you use:
- Heavy Cast Iron Dutch Oven - Baking sourdough in a hot dutch oven provides the perfect humid environment for the loaf to become golden and crusty. If you don’t have one, you can swap in a heavy pot with a tight-fitting lid. That said, do yourself a favor and invest in a pretty one — you don’t have to spend hundreds of dollars to get a quality dutch oven these days!
- Banneton Basket- Also known as a bread-proofing basket or a brotform, bannetons come in basically every size and shape imaginable and they help to impart a pretty design on your bread dough crust.
- Razor - While you can totally get a specific bread scoring knife known as a lamé, you don’t need one if you’re just giving breadmaking a try. Just grab a fresh, clean razorblade instead to slash the dough.
- Parchment - I’ve said it before and I’ll say it again: parchment is a non-negotiable in the baking world! In this instance, it’ll allow you to carefully lower your sourdough bread into a preheated dutch oven without burning yourself or dropping the loaf.
⏲️ Substitutions & Variations
- Extra Rustic - Take a page from my overnight rustic sourdough recipe and add a dose of whole-grain goodness. Feel free to use up to 20% whole wheat flour by weight for added fiber, plus an irresistible nutty flavor undertone.
- Flavored Raisins - If you love rum raisin ice cream, consider swapping in hydrated raisins to your sourdough loaf. You can also use sweet orange juice (and add a few rasps of freshly grated orange zest to the dough!) if you prefer.
- Change the Shape - Make your cinnamon raisin sourdough slices a bit more evenly-sized by elongating it into an oblong batard instead of a round boulé.
- Add Nuts or herbs to the sourdough loaf - If you want a little extra crunch to contrast with the chewy raisins, consider folding in toasted, chopped walnuts or pecans. For a boost of flavor, consider adding finely grated parmesan cheese, chopped rosemary or spices!
This recipe has not been tested with other substitutions or variations. If you replace or add any ingredients, please let us know how it turned out in the comments below!
📖 Step by Step Instructions
If you're a visual learner like I am, I've added a recipe video that goes through the entire process of making sourdough bread here to accompany the following directions. Let's get started!
Mixing and Folding the Sourdough Dough
Step 1: Make Levain. Mix active starter and water together before adding bread flour and mix until homogenous approximately 12 hours before you start the process of making your sourdough loaf. Place in a covered container at room temperature.
Step 2: Autolyse. Mix your levain and warm water together until combined in a large bowl. Then mix in the bread flour until little to no clumps remain with a spatula, wooden spoon or your hands and cover with a tea towel, plastic wrap or damp kitchen towel for 45 minutes.
Step 3: Add Salt. Add 2 teaspoons of kosher salt to your dough mixture and mix with a spatula or your hands until the salt granules have dissolved completely into the dough. Place in a bowl greased with one tablespoon of olive oil, cover, and set aside to rest for another 45 minutes.


Step 4: Folding The Dough. Gently stretch the dough in an upwards motion before placing back onto itself - do this four times every 30 minutes rotating around the dough as you do so. Repeat for a total of 4 times over 2 hours. Once you’ve folded the dough 4 separate times, let the dough rest for 45 minutes before continuing.
Step 5: Pre-Shape. Shape the bread into a boule or circle by turning it out onto a work surface or wooden cutting board greased with a touch of olive oil. Gently stretch 6 sides of the dough into the center to create a circular shape. As the dough rises, air bubbles have formed due to fermentation - stretch gently so we don't deflate the dough. Then, place dough upside down and drag the dough gently while creating friction towards yourself about ten times. Allow the dough to rest, covered by a towel for 30 minutes before continuing.
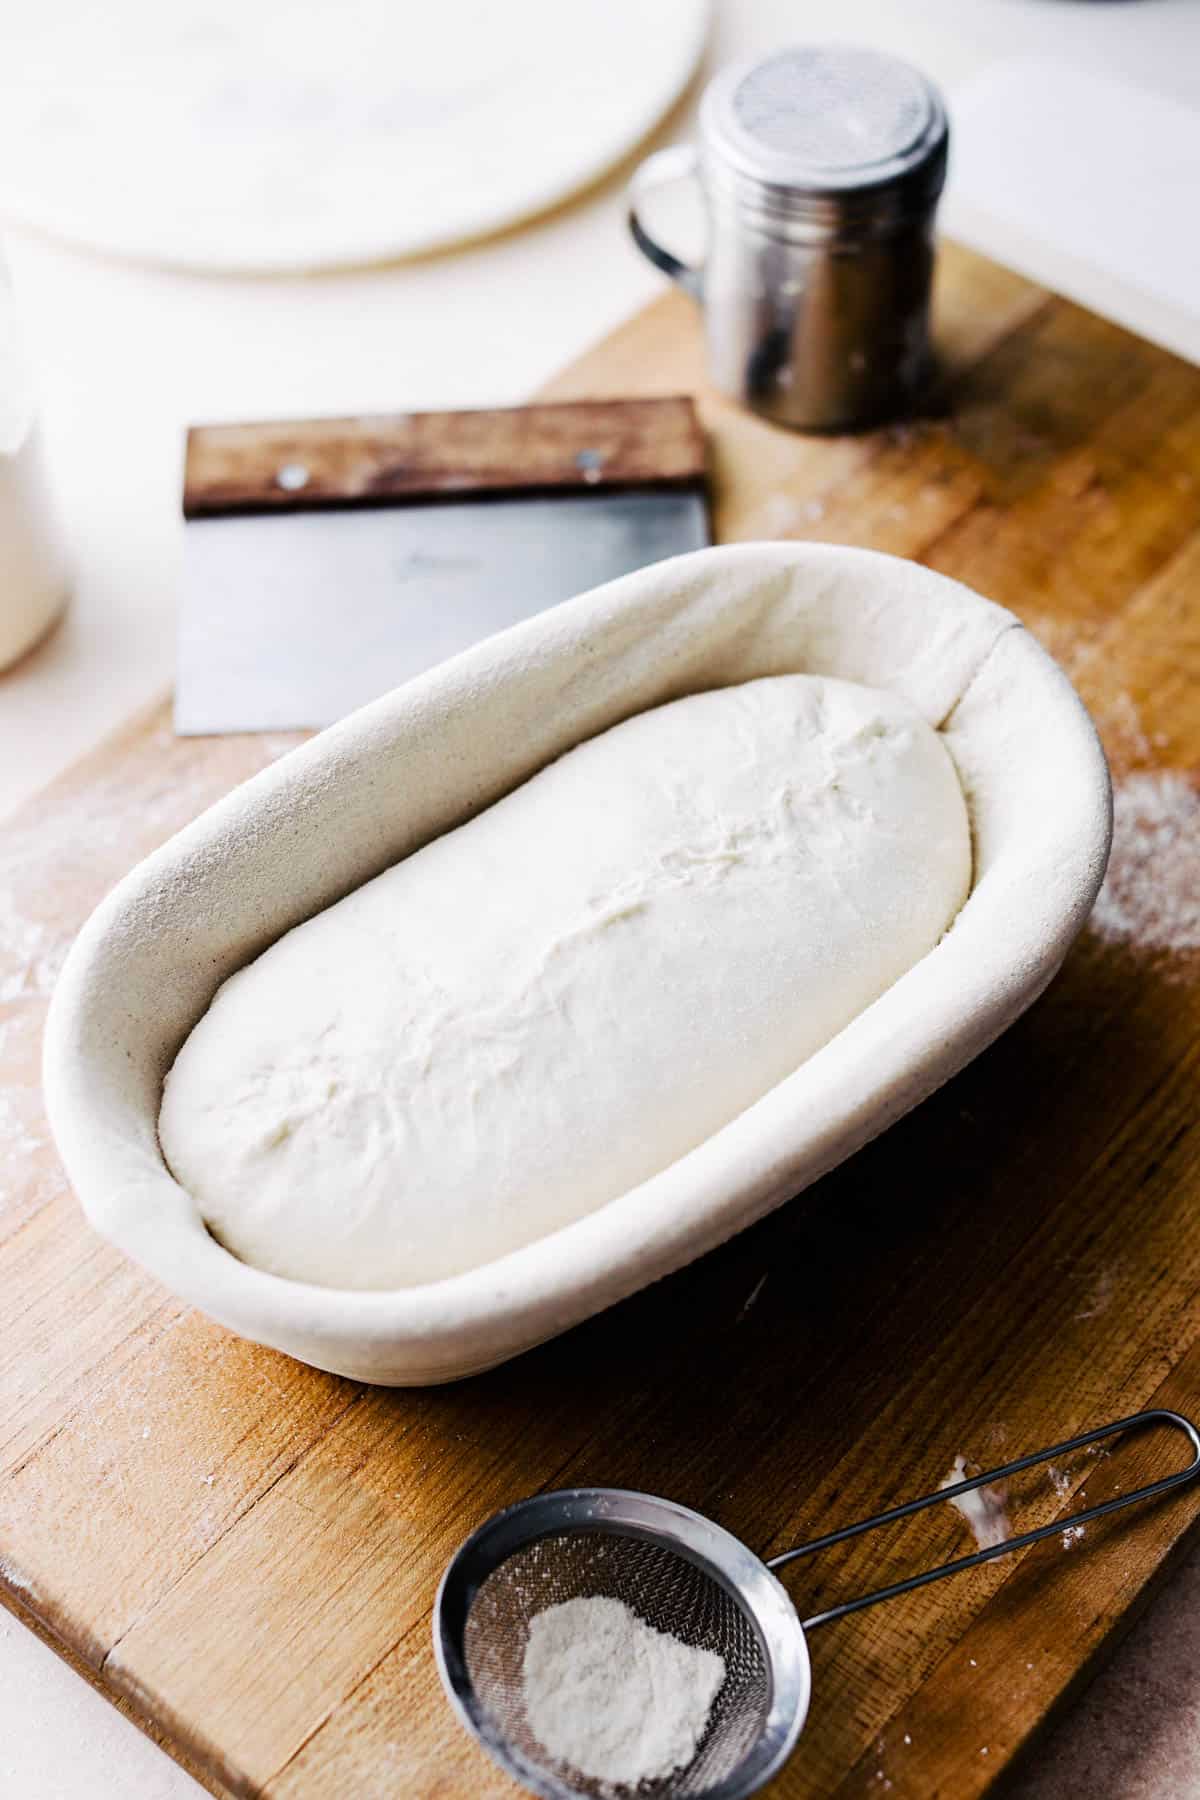
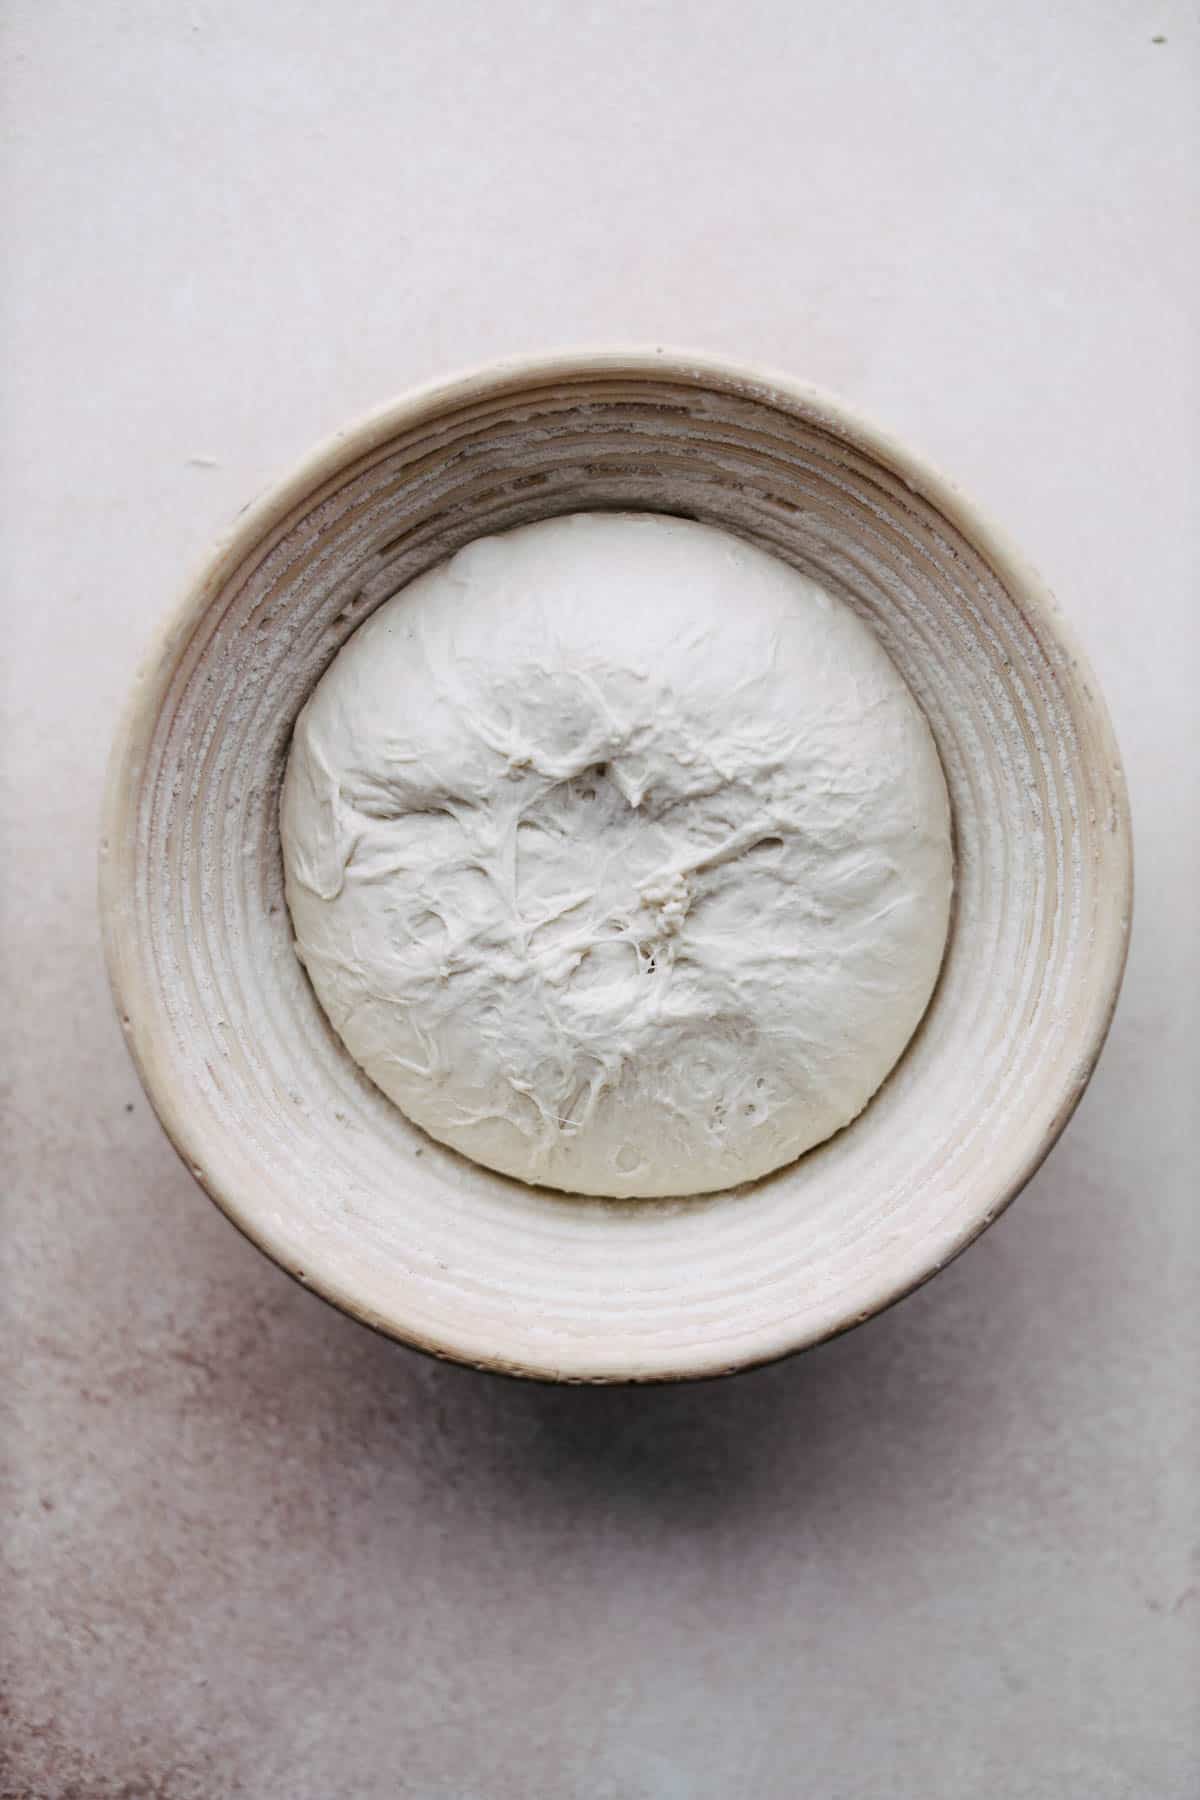
Step 6: Final Shape. Once again, follow the instructions above to build surface tension on the top of the bread before placing the dough seam side up into a banneton dusted with rice flour for best results. Place in the fridge for an overnight rest and the final rise.

Scoring and Baking your Sourdough Loaf
Step 7: Preheat. The next day or next morning, preheat the oven to 450 degrees with your dutch oven placed inside while preheating - turn on your timer for 45 minutes. After turning on your oven, remove your sourdough from the fridge.
Step 8: Score. Grab a piece of parchment paper larger than the diameter of the dough and flip the cold dough onto the parchment paper. Using a lame, razor blade sharp knife or kitchen shears, score the top of the loaf from top to bottom.
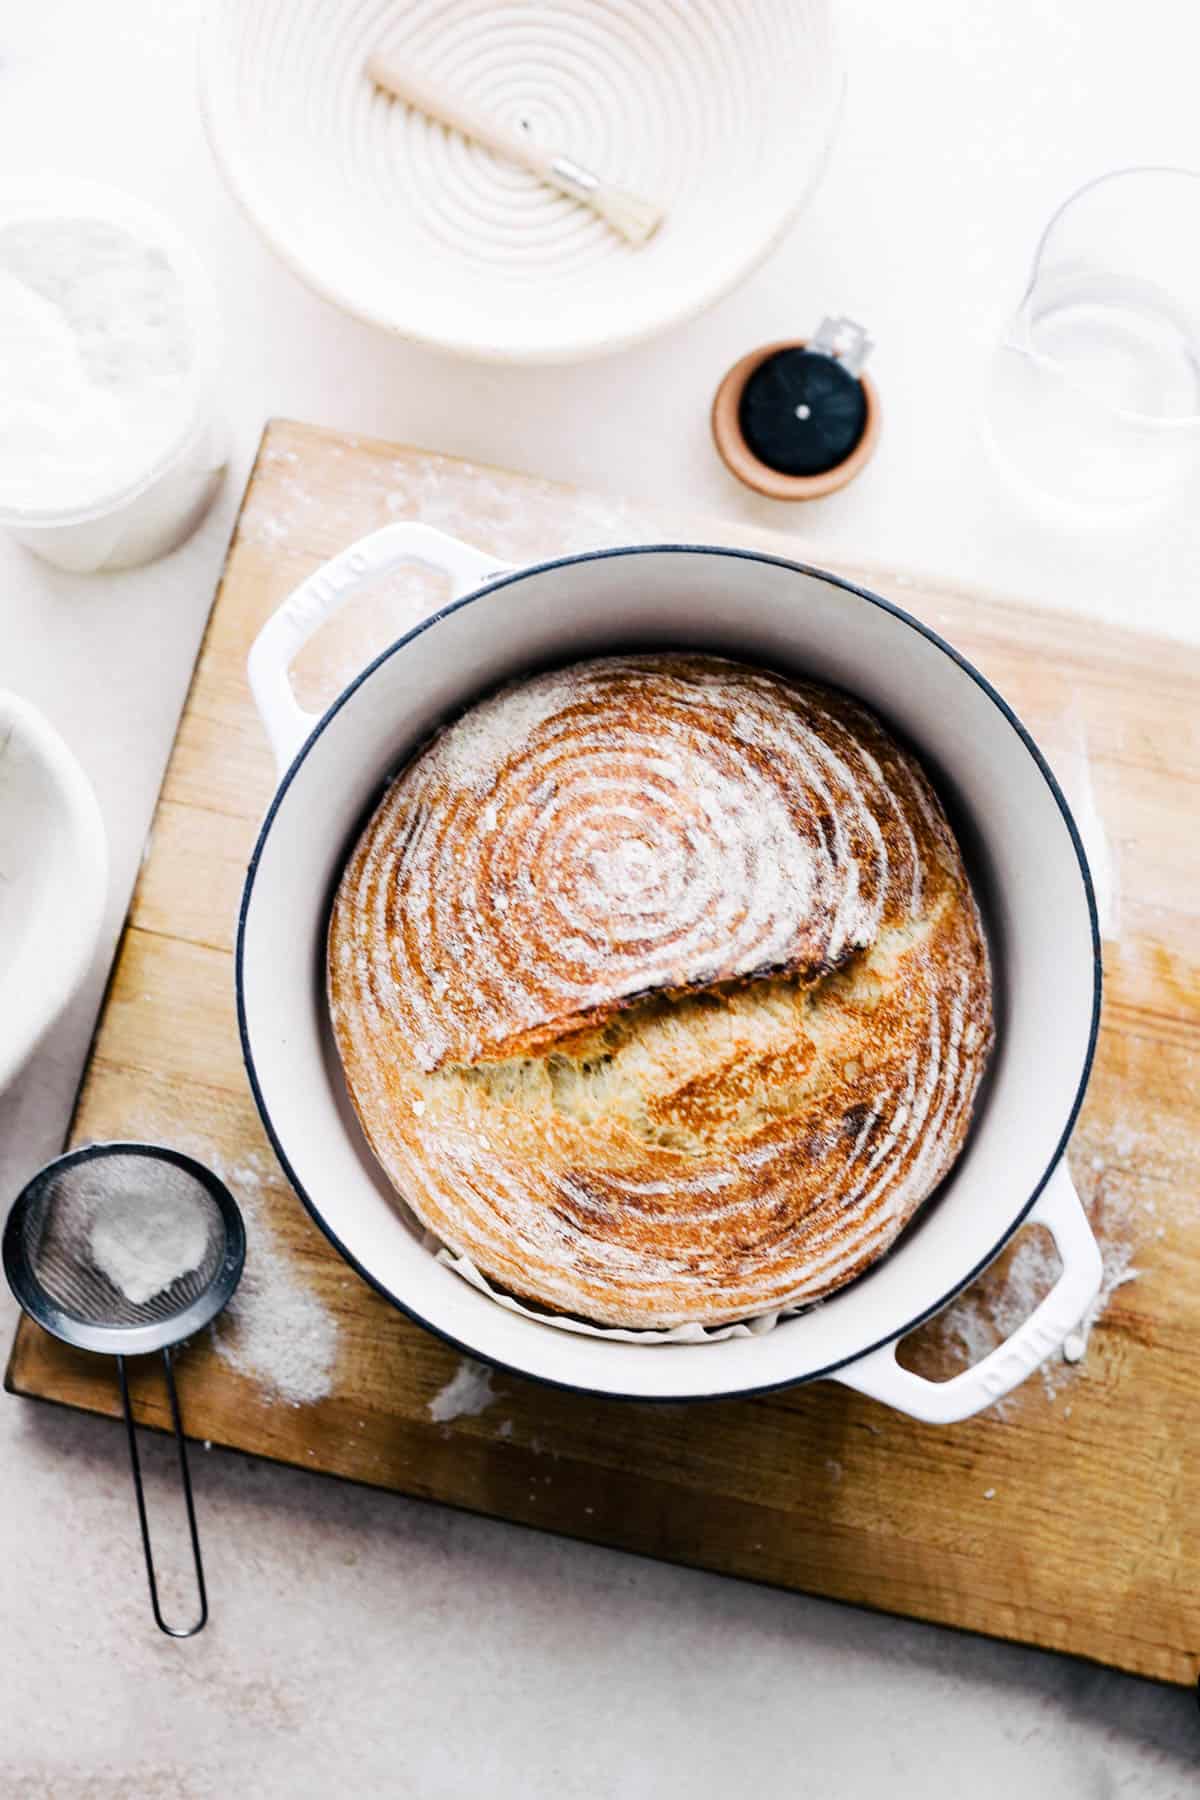
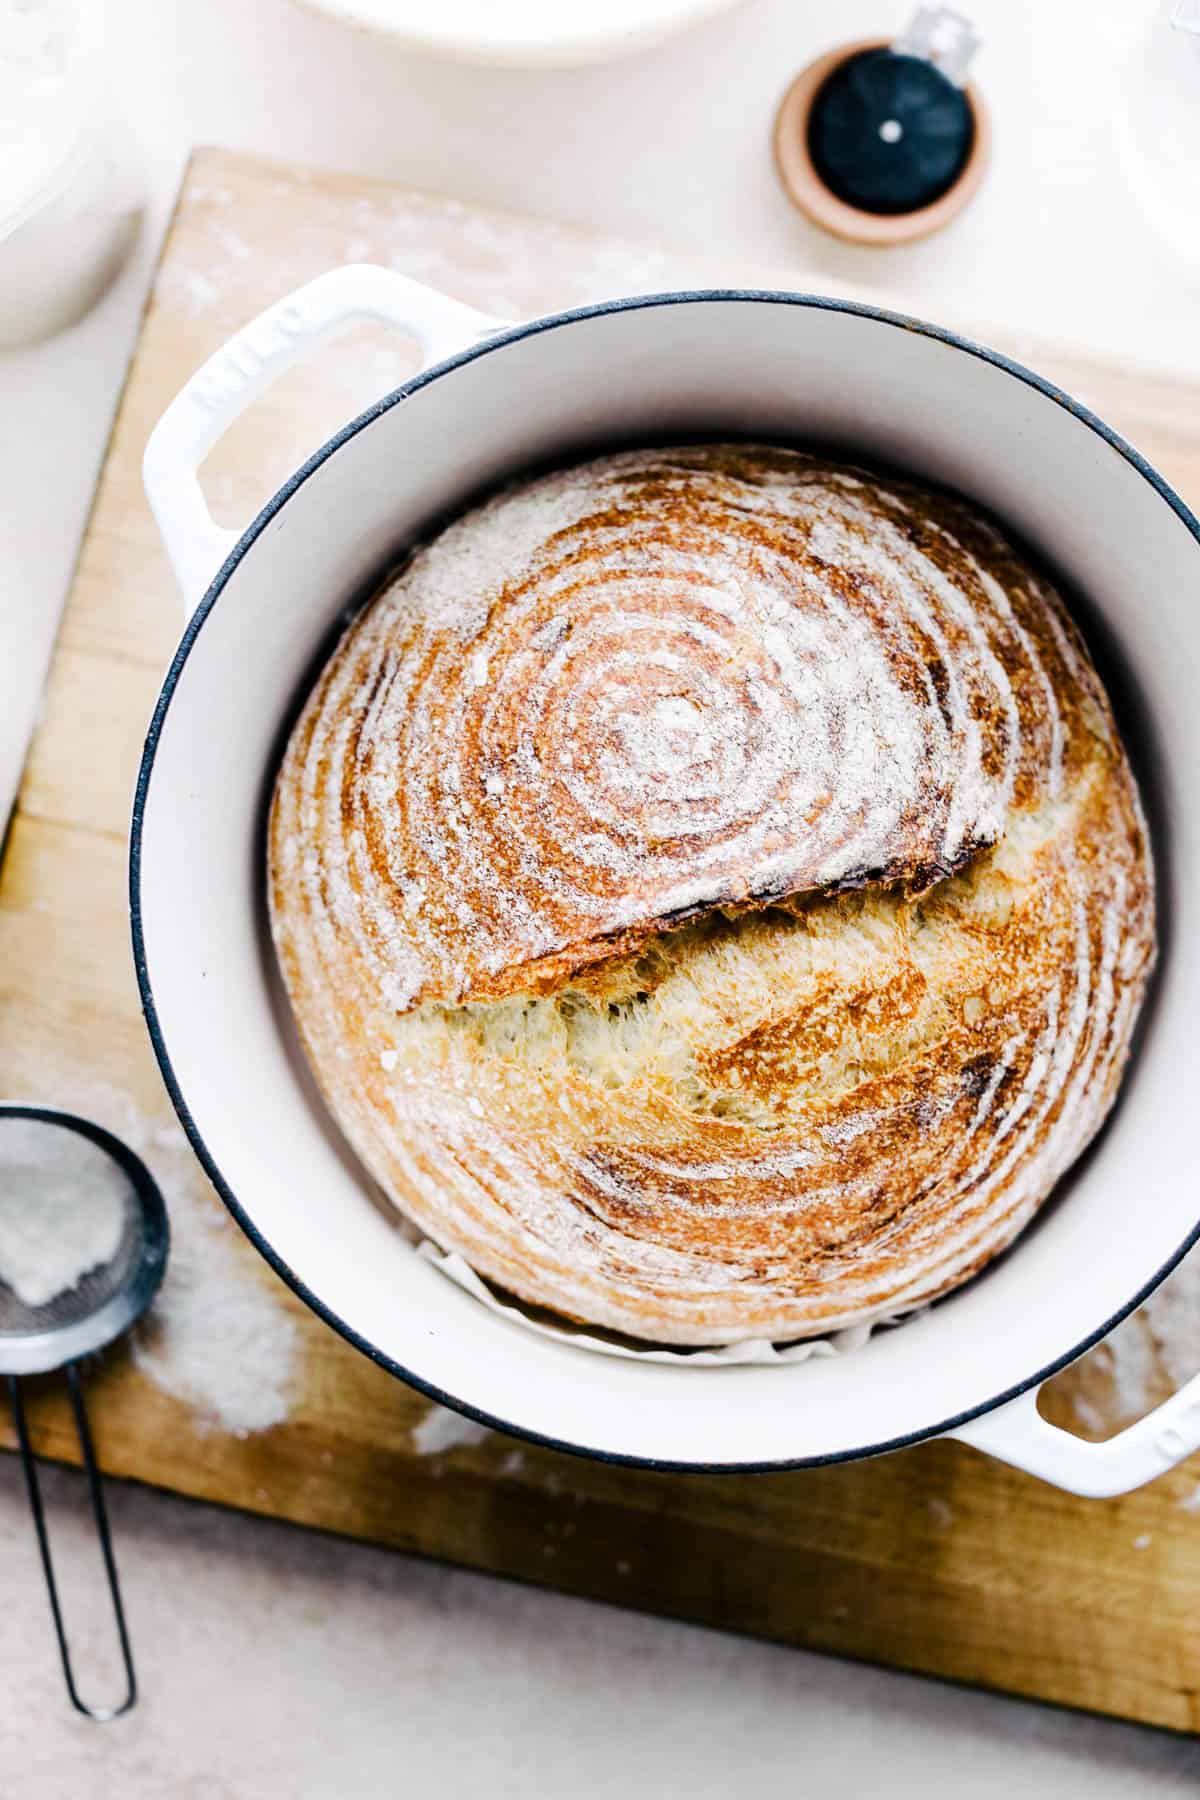
Step 9: Bake. Once your 45-minute timer has gone off, place the loaf into your preheated Dutch oven. Bake for about 25 minutes or until you start to see a hint of browning on the edges and top of your loaf. Once you see the top start to brown, you can remove the dutch oven lid completely. Bake for an additional 20 minutes or until the loaf of bread is a rich, dark golden brown with a crispy crust formation.
PRO TIP: Be careful not to burn yourself or drop in your sourdough! The parchment paper is your friend here - use the parchment paper as grips to gently lower the loaf into the dutch oven and place the lid on top.
Step 10: Remove Loaf & Cool. Remove the dutch oven from the oven and carefully remove the sourdough from within - I usually use a small spatula to coax one side of the bread from the bottom of the dutch oven, allowing me to remove the hot sourdough loaf and place it on a cooling rack for a minimum of 1 hour.
👩🏻🍳 Expert Tips
- Do a float test. You want to make sure your starter is at 100% hydration, which you can check with a simple float test.
- Keep a bowl or glass of water nearby. When you are first starting to make the sourdough dough, it will be very sticky. Dipping your hands into a bowl of water before mixing will help immensely!
- Wait an hour before cutting. It will be very challenging to wait before cutting into the artisan bread, but I promise you it’s worth it! Cutting into your bread when it is too hot could ruin its structure, though it will still be tasty!
- Use the parchment as your guide to get it into the Dutch oven. You want the dutch oven to be 450F before gently placing the boule inside, which is a tricky endeavor if you want to avoid burning yourself. That’s where the parchment comes in handy — use the corners to help you gently guide the loaf into its snuggly, warm room. Just make sure you DON’T DROP THE LOAF IN. This will totally deflate your last rise, leaving you with a dense result.
- Make a proofing drawer in your oven. Bread likes a warm place to rise (unless you’re leaving it overnight in the fridge, which slows the process down). If your house is under about 75F, you can easily create a warm, cozy spot for the sourdough to rise by placing a cake tin or bowl in the bottom of your oven that is turned off. Fill it with some boiling water, then place the proofing bowl on a rack situated in the middle of the oven. The latent heat and humidity from the water will provide a perfect place for the dough to rise.
💭 Recipe FAQs
You can easily make your own starter to make an artisan-style loaf using flour and water, or you can buy it online or from specialty stores. If you have any friends who like to make bread, I’d also bet they have some they’d happily gift you! Head to my guide for freezing sourdough starter if you want to store your starter for longer periods of time!
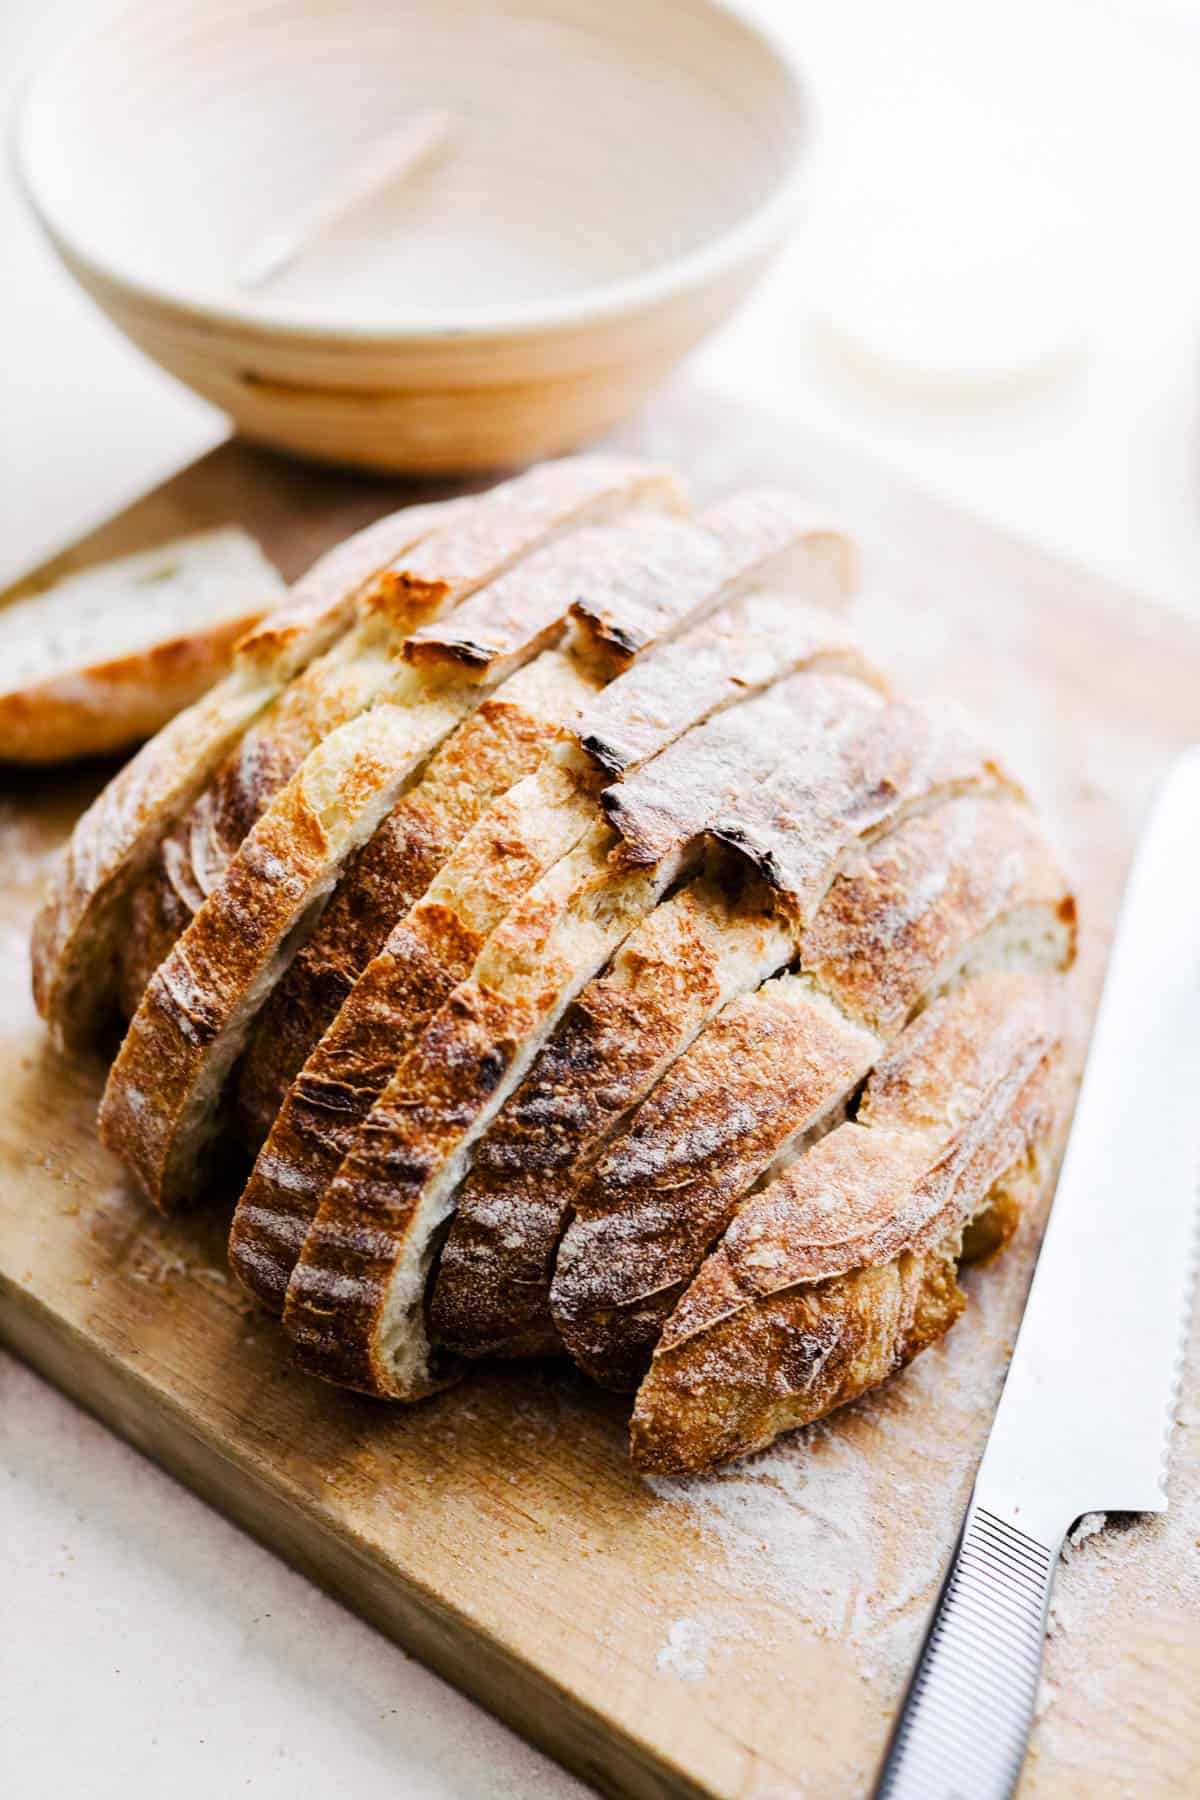
If you keep it in an airtight container on the counter, it should last for 3-4 days. However, if you want it to last longer, I suggest slicing it, placing it in a plastic bag, and freezing for up to a month. Whenever a bread craving strikes, just grab a slice!
For more tips on how to store sourdough bread, head over to my in-depth guide!
I prefer bread flour, which has a higher protein content than regular all-purpose flour. More protein means more gluten, which in turn means a better structure for the bread to be crusty on the outside and irregularly crumbed on the inside. YUM!
I suggest reaching for a round dutch oven that is no smaller than 4 quarts and no larger than 7 quarts. I personally like using my 5 ½ quart dutch oven for making this sourdough loaf.
When preparing your sourdough bread recipe, use wet hands to handle the dough ball to prevent sticking. Allow the dough to rise at room temp, ensuring a second rise for a better oven spring. Baking in the best Dutch oven at high temperatures ensures an artisan sourdough bread finish. There are many types of dutch ovens in terms of size and shape, so make sure to choose one that works well for you!
Natural yeast gives an authentic taste to the sourdough, taking a longer time, while instant yeast offers an easy way to achieve easy sourdough bread faster. For better mixing, a dough whisk or dough hook in a stand mixer can be handy. Some bakers might provide affiliate links to these tools without extra cost, earning a small commission.
📏 Tips for accurate measuring
When it comes to the science of bread baking, it is imperative that us bakers are measuring your ingredients as precisely and accurately as possible. This is why I highly recommend that you invest in a kitchen scale!
Dry ingredients in particular can vary widely in terms of weight vs. volume depending on how you measure them. I know it can be a challenge if you are a beginner, but using a scale will also save you time; cut back on cleanup; and will allow for more consistent baking success - a total win!
More Great Sourdough Recipes


More Homemade Bread Recipes


If you try this recipe for Dutch Oven Sourdough Bread, please leave a 🌟 review and share your creation with me on social media! You can find me on Instagram, Facebook, Youtube and Pinterest - for more delicious recipes sent straight to your inbox, sign up for my newsletter! 📧

Sourdough Bread (Dutch Oven Method)
Equipment
Ingredients
Levain
- 20 g (1 Heaping Tablespoon) Sourdough Starter, 100% hydration, float test before using
- 80 g (⅓ cup) Water
- 80 g (⅔ cup) Bread Flour
Sourdough Bread
- 100 g (½ cup) Levain
- 360 g (1 ½ cups) Water, 70 degrees F ideally
- 500 g (4 cups) Bread Flour
- 2 Teaspoons Salt
- Olive oil - for greasing bowl
- 3 Tablespoons Rice flour - for dusting banneton
Instructions
Levain
- Make sure to do a float test - It’s the best way to tell if your starter is fresh. Simply pinch off about 1 tablespoon of your starter and place it in a glass of water. If it floats, you're in business!
- Mix starter (20g) and water (80g) together before adding bread flour (80g) and mix until homogenous approximately 12 hours before you start the process of making your Sourdough loaf. Place in a covered container at room temperature.20 g Sourdough Starter, 80 g Water, 80 g Bread Flour
Sourdough Bread
- Mix your levain and water together until combined. Then mix in the bread flour until little to no clumps remain with a spatula or your hands and cover for 45 minutes. This is called the autolyse - hydrating your flour prior to moving on to the next step.100 g Levain, 360 g Water, 500 g Bread Flour
- *When making sourdough it’s helpful to have a little bowl of water nearby - dipping your hands in water prior to working with the wet, sticky dough will help immensely!
- Add 2 teaspoons of kosher salt to your dough and mix with a spatula or your hands until the salt granules have dissolved completely into the dough. Place in a bowl greased with one tablespoon of olive oil, cover, and set aside to rest for another 45 minutes.2 Teaspoons Salt, Olive oil - for greasing bowl
- Time to start folding the dough - every 30 minutes for the next two hours fold your dough as shown in the video below. Gently stretch the dough in an upwards motion before placing back onto itself - do this four times every 30 minutes rotating around the dough as you do so.
- Once you’ve folded the dough 4 separate times, allow it to rest for 45 minutes before continuing.
- Pre-shape - Shape the bread into a boule or circle by turning it out onto a wooden cutting board greased with a touch of olive oil. Gently stretch 6 sides of the dough into the center to create a circular shape. Then, flip the ball of dough upside down and drag the dough gently while creating friction towards yourself about ten times. This process is show in detail within the video below. Allow the dough to rest, covered by a towel for 30 minutes before continuing.
- Final Shape - Once again, follow the instructions above before placing the dough seam side up into a banneton dusted with rice flour. Place the shaped sourdough in the fridge overnight, wrapped in plastic wrap or covered with a lid or damp towel, to allow for a slow, cold final proof.3 Tablespoons Rice flour - for dusting banneton
- The next morning, preheat the oven to 450 degrees with your dutch oven placed inside while preheating - turn on your timer for 45 minutes. After turning on your oven, remove your sourdough from the fridge. Grab a piece of parchment paper larger than the diameter of the dough and flip the cold dough onto the parchment paper. Using a lame or a razor blade, score the bread on ⅓ of the loaf from top to bottom right close to the end of the 45 minute timer. See the video below for an example! Once your 45 minute timer has gone off, place the scored loaf into your preheated dutch oven. Be careful not to burn yourself or drop in your sourdough! The parchment paper is your friend here - use the parchment paper as grips to gently lower the loaf into the dutch oven and place the lid on top.
- Bake for about 25 minutes or until you start to see a hint of browning on the edges and top of your loaf. Once you see the top start to brown, you can remove the lid completely. Bake for an additional 20 minutes or until the bread is a rich, dark golden brown.
- Remove the dutch oven from the oven and carefully remove the sourdough from within - I usually use a small spatula to coax one side of the bread from the bottom of the dutch oven, allowing me to remove the hot sourdough loaf and place it on a cooling rack.
- It will be very challenging to wait before cutting into the loaf, but I promise you it’s worth it! Cutting into your bread when it is too hot could ruin it’s structure - I usually wait an hour at the very least before diving in unless you don’t mind cutting in early.
Video
Notes
- Where can I get sourdough starter? You can easily make your own using flour and water, or you can buy it online or from specialty stores. If you have any friends who like to make bread, I’d also bet they have some they’d happily gift you!
- How long does homemade sourdough bread last? If you keep it in an airtight container on the counter, it should last for 3-4 days. However, if you want it to last longer, I suggest slicing it, placing it in a plastic bag, and freezing for up to a month. Whenever a bread craving strikes, just grab a slice!
- What is the best flour for sourdough bread? I prefer bread flour, which has a higher protein content than regular all-purpose flour. More protein means more gluten, which in turn means a better structure for the bread to be crusty on the outside and irregularly crumbed on the inside. YUM!
- What is the best size dutch oven for baking bread? I suggest reaching for one that is no smaller than 4 quarts and no larger than 7 quarts.


Madalyn Mckenzie
My best loaf BY FAR!
Heather Wartanyan
Is the loaf supposed to be room temperature before baking or pull from the fridge and score right before putting in oven?
Emily Laurae
You can pull the loaf from the fridge as you're preheating the oven & dutch oven - then score right before you put it in the oven!
Emma
If I don’t have rice flour to dust my banneton what do you recommend as substitute?
Emily Laurae
All-Purpose flour will be fine!
Sarah Mader
HI!
I am excited to try your recipe 🙂
However - where do you get your 1 day 1 hour 15min:
You would actually start this 3 days ahead or so:
-If I want to bake this on Friday, you will start Wednesday:
-Day 1 Levain: 12 hours /overnight (day 1)
-Day 2: 5.5 hours of shaping etc and proofing w/ overnight in fridge
-Day 3: 45 minutes rest / 30 min. baking / 1 hour resting
I think this is great of course, but if you didn't read thru the recipe, you may think it was an overnight 1-day recipe as many are. I just thought that should be clearer.
Venise
I have been making sourdough bread for about 6 weeks now. I have had many bombs (actually threw them away!). Then I tried your recipe and WOW, I finally made great sourdough bread. I have a friend who is a commercial baker and he said that my loaf was wonderful. I have a family of 4 and 1 loaf is consumed in 2 days. So I definitely need to make more than one loaf at a time. Hence my question - can I double this recipe to make 2 loaves at once?
Also do you have a recipe for sourdough loaf bread for sandwiches?
Thanks so much - I never thought I could actual make a great sourdough bread.
Emily Laurae
This makes me so happy to hear Venise! What a wonderful comment to receive. And your question about multiple loaves is quite timely - this past weekend I made a triple batch and it worked perfectly. I would suggest baking the loaves separately rather than all at once in your oven. Additionally, between loaves, allow your dutch oven to properly reheat with the lid closed for 30 minutes before baking your next loaf. Let me know if you have more questions about this and I would be happy to provide my thoughts!
Regarding the sourdough loaf bread, that's actually a recipe I'm working on currently! I'm hoping to have the recipe up by the end of the month. Stay tuned and wishing you a great week Venise!
Mary Ruffin
I made this recipe last month and my husband won't let me go back to my previous sourdough recipe/method...it was delicious! I'd like to know if you've ever tried to shorten the last rise/rest. In other words, skip the fridge and push the rise at room temp or warmer. Also, have you ever incorporated white whole wheat flour along with the bread flour?
Jim Sweeney
Hi, you wrote:
" After turning on your oven, remove your sourdough from the fridge."
Huh, where did you mention putting it in the fridge?
The sequence of events seems a bit confused. Would like to try your technique but need some clarification to do so.
Thanks, Jim
Jim Sweeney
Sorry, for some reason when the instructions are printed there is no mention of placing in the fridge, Upon re-reading online I see it.
Thanks, Jim
Emily
No problem Jim - thanks for letting me know, I'll look into that printing portion. Enjoy!
Emily Dykhoff
Loved the entire process to this loaf. The video alongside detailed instructions made it simple. I was so impressed with how my loaf turned out - and the deliciousness!
Also, huge shout-out to Emily for answering one of my questions via Instagram. How cool to get almost live feedback while recreating a recipe. I am definitely a fan of Emily's now and I will be trying more of her recipes!
Emily
So glad you enjoyed Emily - the photo of the loaf you shared was amazing!!
Eugene
I have been making sourdough starter for a long time and sourdough bread. I'm going to try your recipe I'm looking forward to it especially the raisins added to the sourdough starter
Does the parchment paper stay inside the Dutch oven and bake along with the bread?
Emily
Can't wait to hear your thoughts Eugene - and yes, I place the bread in the parchment sling straight into the preheated dutch oven and remove the parchment after the bread has finished baking!
Debbie Houston
How do I make sourdough starter
Emily
There's actually a link to how to make sourdough starter throughout this page! You can search in the search bar "Sourdough Starter" and click on the link for the entire blog post - enjoy!